Disclaimer: I am not involved in any way in the diygadget.com company. Neither am I involved in the TIAO GBoard manufacturing. If you have issues loading a GIMX firmware on a TIAO GBoard, please ask for help on the TIAO forum first.
Earlier this year, diygadget.com has released the TIAO GBoard. Thanks to diygadget.com for donating a TIAO GBoard and 90€ to the GIMX project!
At this time the board is sold at a special price of $21.99 (regular price is $29.99). Of course it is somewhat more expensive than building the adapter yourself, but it is a very good option for people that don’t want to get through the hassle of making a DIY USB adapter. Another good point for buying this board is stability: disconnecting something when manipulating the board is very unlikely.
 Photo courtesy of diygadget.com.
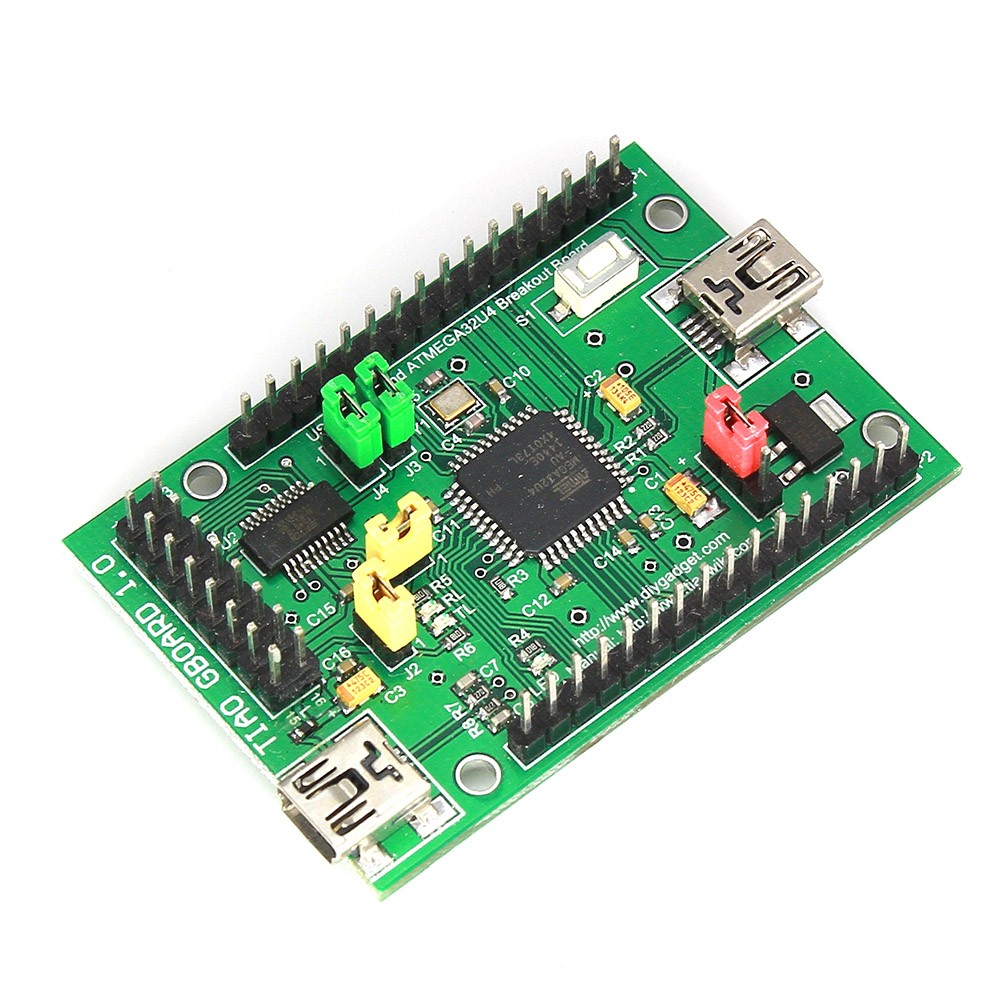
This board embeds a FT231X chip and an atmega32u4 chip. Those chips can be easily connected together using jumpers. The board exposes all the pins of the chips through headers at the cost of a bigger size. This means it is possible to use it for other projects. For example it should be possible to convert it to an Arduino Leonardo -compatible board.
It has two mini USB female plugs:
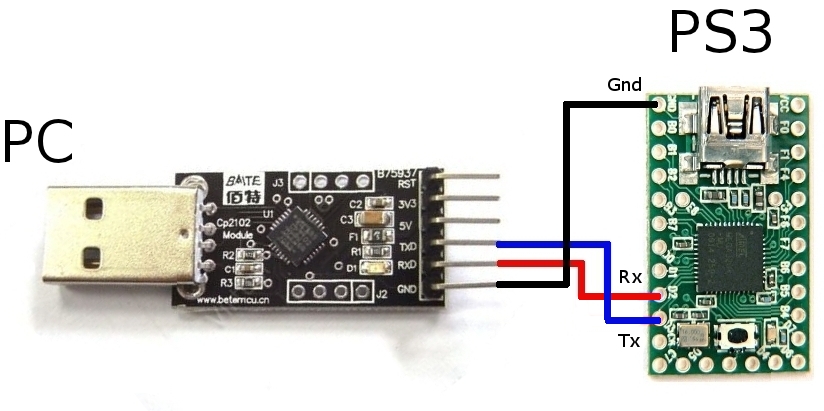
- the one on the left side is connected to the FT231X and has to be connected to the PC
- the one on the right side is connected to the atmega32u4 and has to be connected to the console (or to the PC when loading a firmware)
There are three activity leds on the board:
- RL indicates when data is being received
- TL indicates when data is being transmitted
- LED indicates when the atmega32u4 is reset
One of the very first tests I did was to test the USB to serial chip which is a FT231X from FTDI. For this task I have a small benchmark tool called gserial_test that measures the trip delay of a typical GIMX packet (2-byte header + 64-byte HID report). I’ll try to say more about this tool in a further blog post. The test showed the FT231X is working as expected. On Windows you have to adjust the “Latency Timer” setting.
Loading a firmware on the board is explained on the TIAO wiki. As a GNU/Linux user I tried using dfu-programmer and loading was successful. Using dfu-programmer or Atmel’s FLIP tool on Windows should work fine as well. The procedure is slightly harder than using the Teensy loader (which can only work with genuine Teensy boards).
To test that a firmware runs as expected on the TIAO GBoard, I connected the board to my PS4 and ran GIMX a whole night. During this long run test, some macros kept the PS4 active, sending left button presses followed by right button presses, in a loop. The commands were still taken by the PS4 after about 10 hours, which shows the board is performing as expected!